Red, White and Blue Dirt Cups
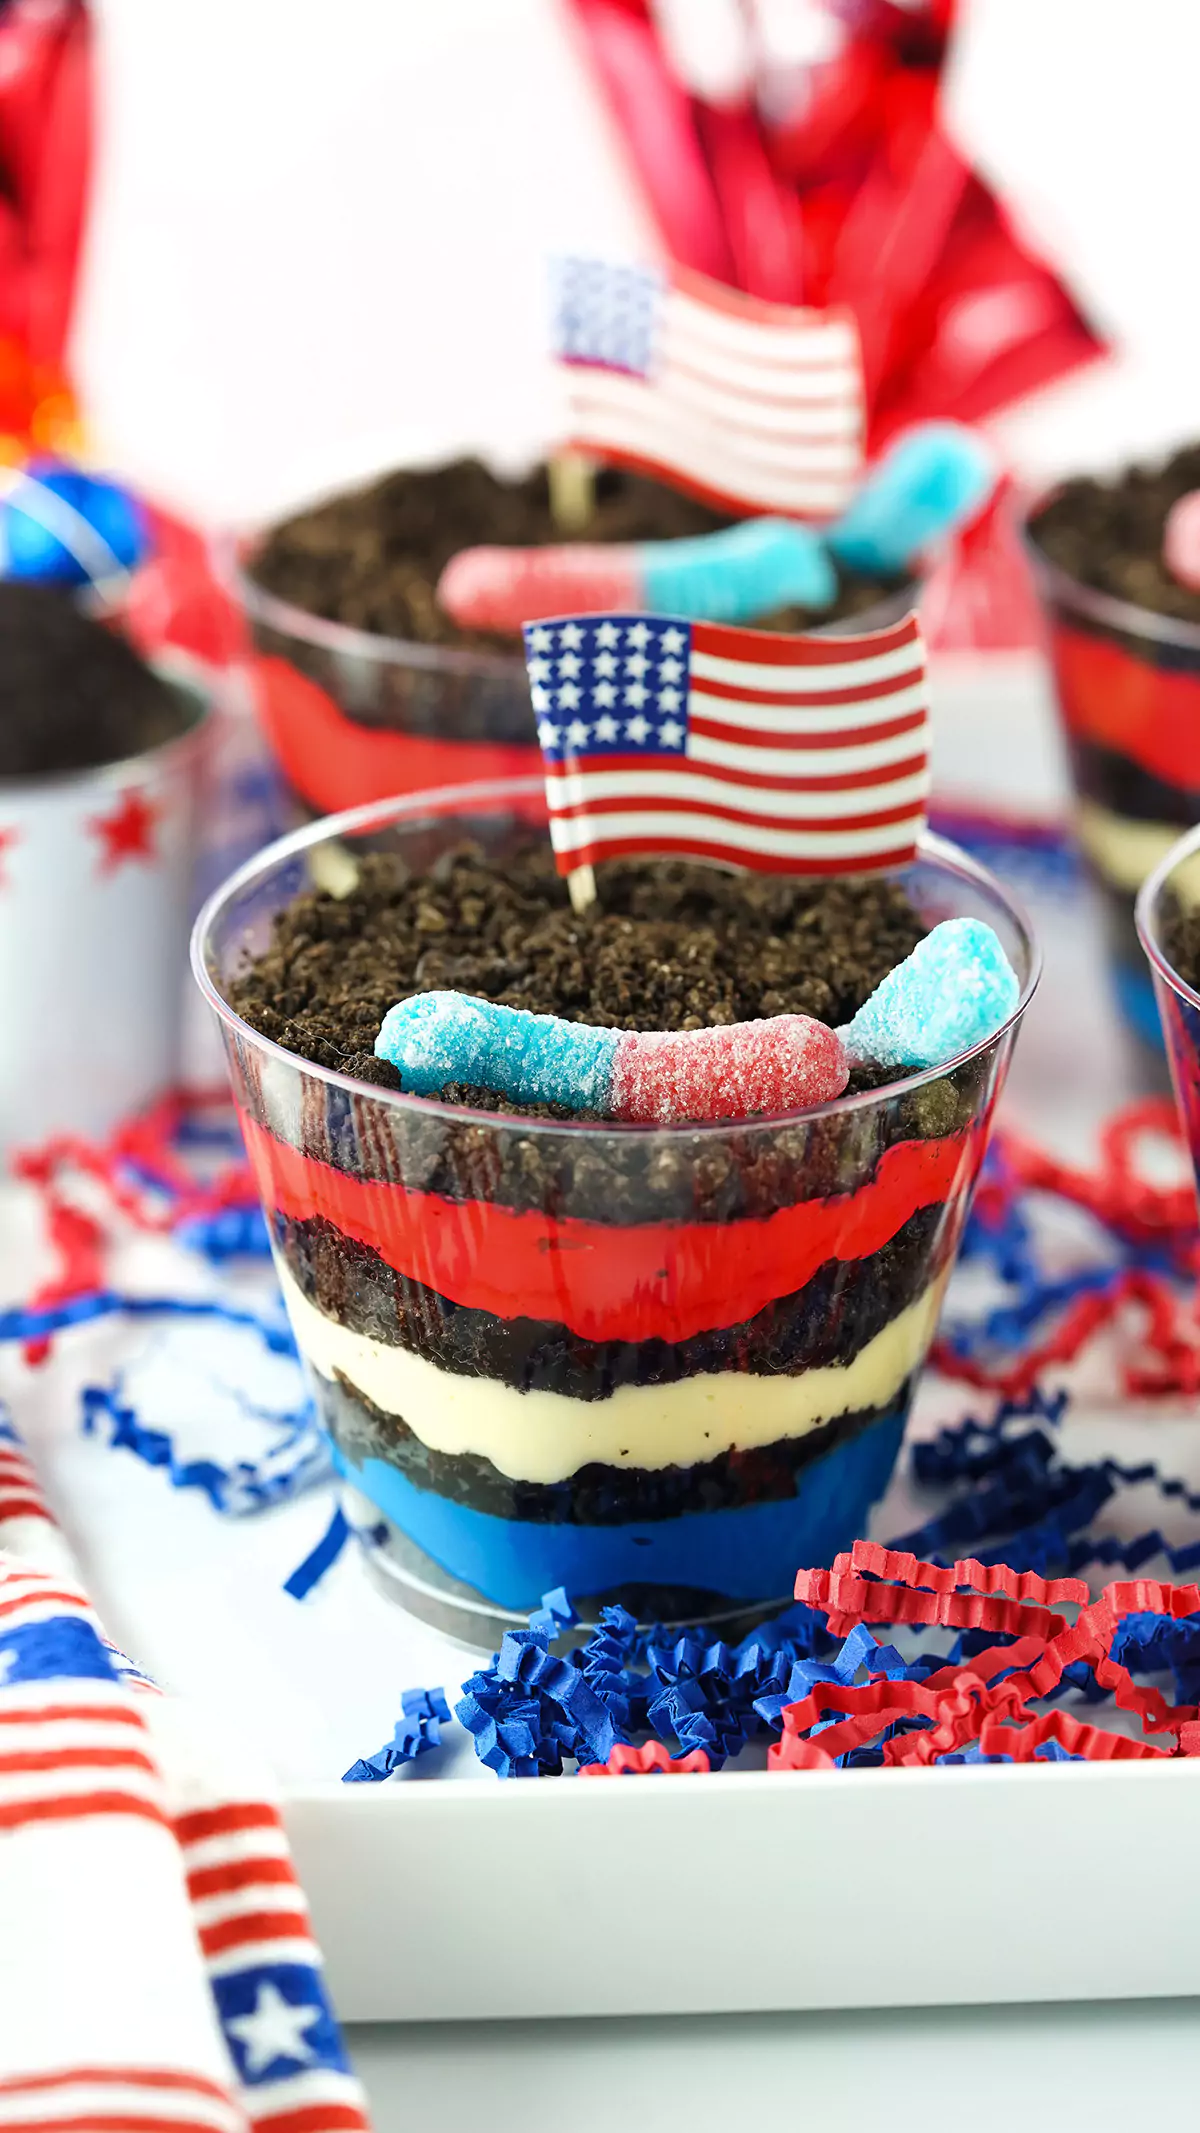
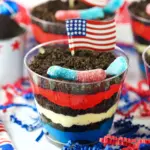
Red, White, and Blue Dirt Cups are a delightful dessert that perfectly captures the spirit of celebration. With their vibrant layers of pudding and crunchy Oreos, these cups not only look festive but also taste amazing. This easy-to-make treat is perfect for the 4th of July and other patriotic events, making it a fun choice for kids and adults alike. Its no-bake nature means you can whip it up in no time, allowing you to focus on enjoying your gathering.
Why You’ll Love This Recipe
- Festive Appearance: The colorful layers make these cups visually appealing for any celebration.
- Kid-Friendly: Children will love the fun presentation and sweet flavors.
- Quick Preparation: With just 10 minutes of prep time, this recipe is perfect for last-minute gatherings.
- No Baking Required: This dessert requires no oven time, making it easy and mess-free.
- Versatile Servings: Perfect for parties or family dinners—everyone can enjoy their own cup!
Tools and Preparation
To create your Red, White and Blue Dirt Cups, you’ll need a few essential tools. These items will help ensure your dessert turns out beautifully layered and delicious.
Grab This Chef Knife Now - Almost Gone!
- Stays Razor-Sharp: Ice-hardened blade keeps its edge longer than ordinary knives
- Superior Grip Control: Unique finger hole design gives you perfect balance and safety
- Built to Last a Lifetime: Premium stainless steel blade with elegant beech wood handle
Customer Reviews ★★★★★
Essential Tools and Equipment
- Mixing Bowl
- Whisk
- Measuring Cups
- Clear Plastic Cups (9 oz)
- Spoon or Spatula
Importance of Each Tool
- Mixing Bowl: A large bowl is essential for combining the pudding mix with milk thoroughly.
- Whisk: Using a whisk helps achieve a smooth pudding texture without lumps.
Ingredients
For the Pudding Layers
- Cheesecake Pudding Mix
- Milk
For the Crunchy Layer
- Oreo Cookies, crushed
For Coloring
- Red & Blue Gel Food Coloring
For Decoration
- Red & Blue Gummy Worms
- Flag Cupcake Toppers
For Serving
- Clear Plastic Cups, 9oz
How to Make Red, White and Blue Dirt Cups
Step 1: Prepare the Pudding Mixture
- Place both boxes of cheesecake pudding mix in a large mixing bowl.
- Add the milk to the bowl.
- Whisk until the pudding has thickened.
Step 2: Color the Pudding
- Separate the pudding into two bowls:
- Place 1 cup of pudding in one bowl.
- Place 1 ½ cups of pudding in another bowl.
- Add blue dye to the bowl with 1 cup of pudding. Stir until no color streaks appear.
- Add red dye to the bowl with 1 ½ cups of pudding. Stir until no color streaks appear.
Step 3: Assemble Your Cups
- Line up your clear plastic cups.
- In each cup, place 1 tablespoon of crushed Oreos at the bottom. Spread evenly.
- On top of the Oreos, add 2 tablespoons of blue pudding and gently spread evenly.
- Add another tablespoon of crushed Oreo over the blue layer and spread evenly again.
- Next, add 3 tablespoons of white pudding as another layer and spread evenly.
- Follow with 1 ½ tablespoons more white pudding; spread it evenly as well.
- Finally, add 4 tablespoons of red pudding as your last layer in each cup.
- For decoration, top each cup with 2 tablespoons of crushed Oreo followed by two gummy worms and one flag cupcake topper.
Enjoy your festive Red, White, and Blue Dirt Cups!
How to Serve Red, White and Blue Dirt Cups
Red, White, and Blue Dirt Cups are a delightful treat that can brighten any gathering, especially on patriotic occasions. Here are some fun serving suggestions to make your dessert cups even more festive.
Individual Desserts
- Serve each dirt cup in a clear plastic cup for a beautiful layered presentation. This allows guests to enjoy the colorful layers visibly.
Group Dessert Table
- Create a dessert table featuring multiple cups arranged together. Add themed decorations like mini flags or red, white, and blue tablecloths for an eye-catching display.
Kid-Friendly Party Favors
- Offer mini versions of the dirt cups in smaller cups as party favors for kids. This makes a great take-home treat after celebrations.
Themed Birthday Parties
- Incorporate these cups into a birthday party theme. Kids will love the colors, and they can be paired with other themed snacks for fun!
Picnic Treats
- Pack these dirt cups in cooler bags for picnics or outdoor barbecues. They are easy to transport and provide a sweet ending to any meal.
How to Perfect Red, White and Blue Dirt Cups
To truly nail this delicious dessert, consider these helpful tips to enhance your Red, White, and Blue Dirt Cups.
- Use Fresh Ingredients: Always opt for fresh milk and quality Oreo cookies for the best taste and texture.
- Layer Carefully: Take your time when layering pudding and Oreos to ensure distinct color separation for that eye-catching look.
- Chill Before Serving: Refrigerate the assembled cups for about 30 minutes before serving. This helps the layers set better.
- Customize Your Toppings: Feel free to add other toppings like whipped cream or fresh berries on top for extra flavor and decoration.
Best Side Dishes for Red, White and Blue Dirt Cups
Pairing side dishes with Red, White, and Blue Dirt Cups can create a well-rounded meal experience. Here are some excellent options to consider:
- Grilled Hot Dogs: Easy to prepare, hot dogs are a classic summer favorite that pairs well with sweet desserts.
- Potato Salad: A creamy potato salad balances the sweetness of the dirt cups with its savory flavors.
- Veggie Platter: Fresh vegetables provide a crunchy contrast; include dips like ranch or hummus for added flavor.
- Fruit Skewers: Colorful fruit skewers made with strawberries, blueberries, and bananas echo the patriotic theme while being refreshing.
- Corn on the Cob: Grilled corn on the cob adds a smoky flavor that complements both savory and sweet dishes nicely.
- Caprese Salad: A light Caprese salad with tomatoes, mozzarella, and basil offers a fresh taste that brightens up any meal.
Common Mistakes to Avoid
Creating Red, White and Blue Dirt Cups can be simple, but there are common mistakes that can affect the final result. Here are some pitfalls to steer clear of:
- Skipping the Whisking Step: Not whisking the pudding thoroughly can leave lumps. Always mix until smooth for the best texture.
- Overfilling the Cups: Adding too much pudding or Oreos can lead to messy layers. Stick to the recommended amounts for clean layering.
- Neglecting Color Mixing: Failing to mix in food coloring completely results in streaks. Ensure no streaks remain for a vibrant appearance.
- Using Non-Clear Containers: Dark cups hide the beautiful layers you create. Use clear plastic cups to showcase your colorful dessert.
- Ignoring Chill Time: Serving immediately after preparation can affect texture. Allow a few minutes for the pudding to set before serving.
Storage & Reheating Instructions
Refrigerator Storage
- Store any leftover Red, White and Blue Dirt Cups in airtight containers.
- They can last up to 2 days in the refrigerator without losing texture.
Freezing Red, White and Blue Dirt Cups
- Freezing is not recommended due to potential texture changes in pudding and cookies.
- If necessary, store in a freezer-safe container for up to 1 month.
Reheating Red, White and Blue Dirt Cups
- Oven: Not suitable for reheating as it may alter texture.
- Microwave: Use short intervals (10-15 seconds) if you must warm them slightly; however, this isn’t ideal.
- Stovetop: Avoid reheating on the stove as it will ruin the layers and presentation.
Frequently Asked Questions
Here are some common questions regarding Red, White and Blue Dirt Cups that may help clarify any uncertainties:
What Are Red, White and Blue Dirt Cups?
Red, White and Blue Dirt Cups are layered desserts made with cheesecake pudding, crushed Oreos, colorful gel food coloring, and gummy worms. They are perfect for patriotic celebrations.
How Long Does It Take To Make Red, White and Blue Dirt Cups?
The preparation time is quick—only about 10 minutes! You can enjoy this delightful dessert almost immediately.
Can I Customize My Red, White and Blue Dirt Cups?
Absolutely! Feel free to add different toppings like whipped cream or swap out Oreos for other cookies based on your preference.
Are These Dessert Cups Kid-Friendly?
Yes! The fun colors and gummy worms make these dessert cups a hit with kids while being easy enough for them to help assemble.
Final Thoughts
Red, White and Blue Dirt Cups are a delightful treat that combines ease with festive charm. Perfect for summer gatherings or holiday celebrations, these cups allow for customization based on your tastes. Don’t hesitate to try this recipe; it’s a crowd-pleaser!
Red, White, and Blue Dirt Cups
- Total Time: 10 minutes
- Yield: Serves 6
Description
Red, White, and Blue Dirt Cups are the ultimate festive dessert that captures the essence of summer celebrations. These delightful layered cups combine creamy cheesecake pudding with crunchy Oreo cookies and vibrant colors, making them a hit for any patriotic occasion, especially the 4th of July. Kids and adults alike will be drawn to their cheerful presentation and sweet flavors. Best of all, this no-bake recipe takes just minutes to prepare—perfect for last-minute gatherings or adding a fun touch to your dessert table. Gather your family and friends to enjoy these easy-to-make treats that promise to bring smiles all around!
Ingredients
- Cheesecake pudding mix
- Milk
- Crushed Oreo cookies
- Red & blue gel food coloring
- Gummy worms (for decoration)
- Flag cupcake toppers
Instructions
- In a mixing bowl, combine the cheesecake pudding mix with milk and whisk until thickened.
- Divide the pudding into two bowls. Color one bowl with blue gel food coloring and the other with red.
- In clear plastic cups, layer crushed Oreos at the bottom, followed by blue pudding, another layer of Oreos, white pudding, and finally red pudding on top.
- Decorate each cup with more crushed Oreos, gummy worms, and a flag topper.
- Prep Time: 10 minutes
- Cook Time: 0 minutes
- Category: Dessert
- Method: No-Bake
- Cuisine: American
Nutrition
- Serving Size: 1 cup (150g)
- Calories: 320
- Sugar: 22g
- Sodium: 150mg
- Fat: 15g
- Saturated Fat: 7g
- Unsaturated Fat: 6g
- Trans Fat: 0g
- Carbohydrates: 44g
- Fiber: 1g
- Protein: 4g
- Cholesterol: 15mg

