Cookie Dough Vegan Ice Cream Sandwiches (Easy + No-Bake!)
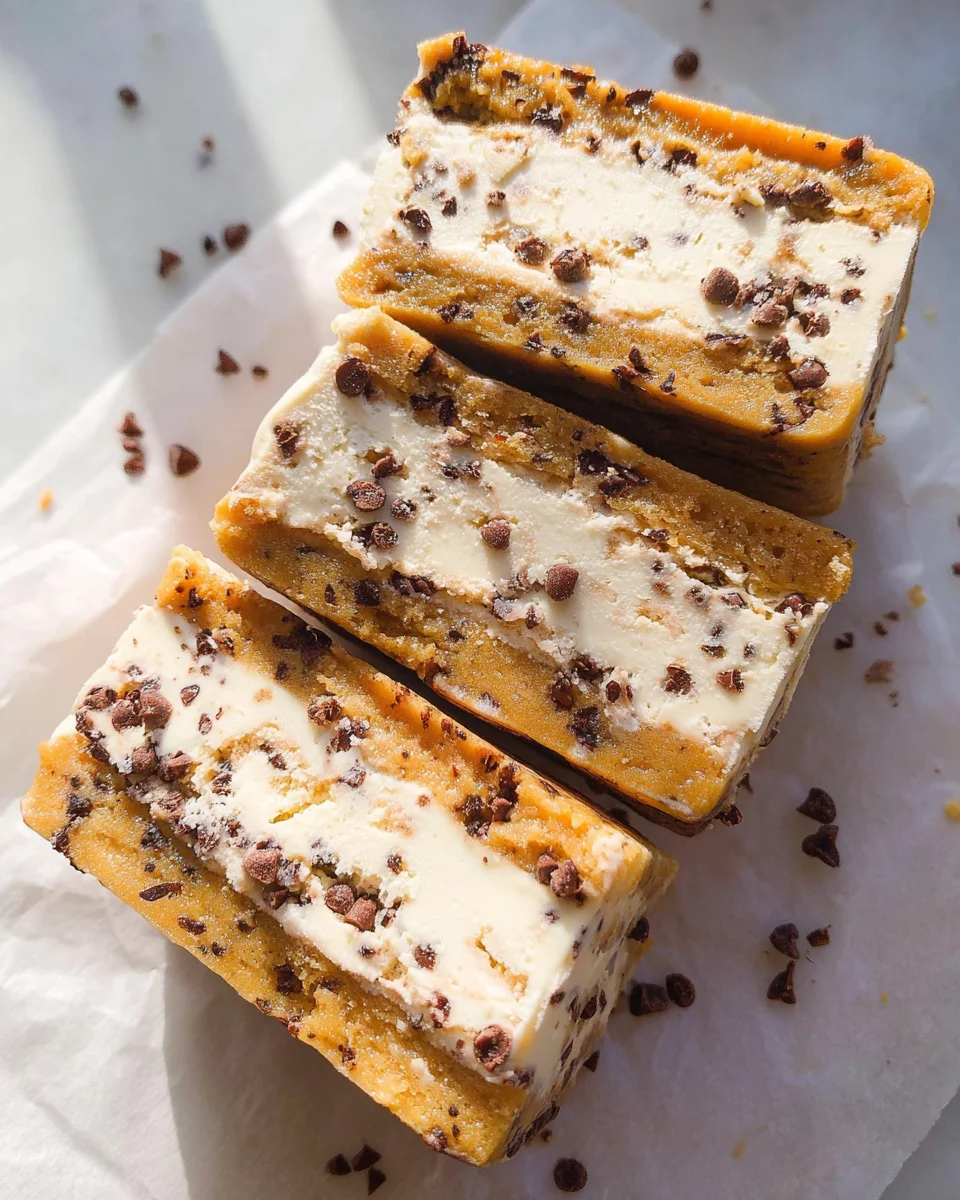
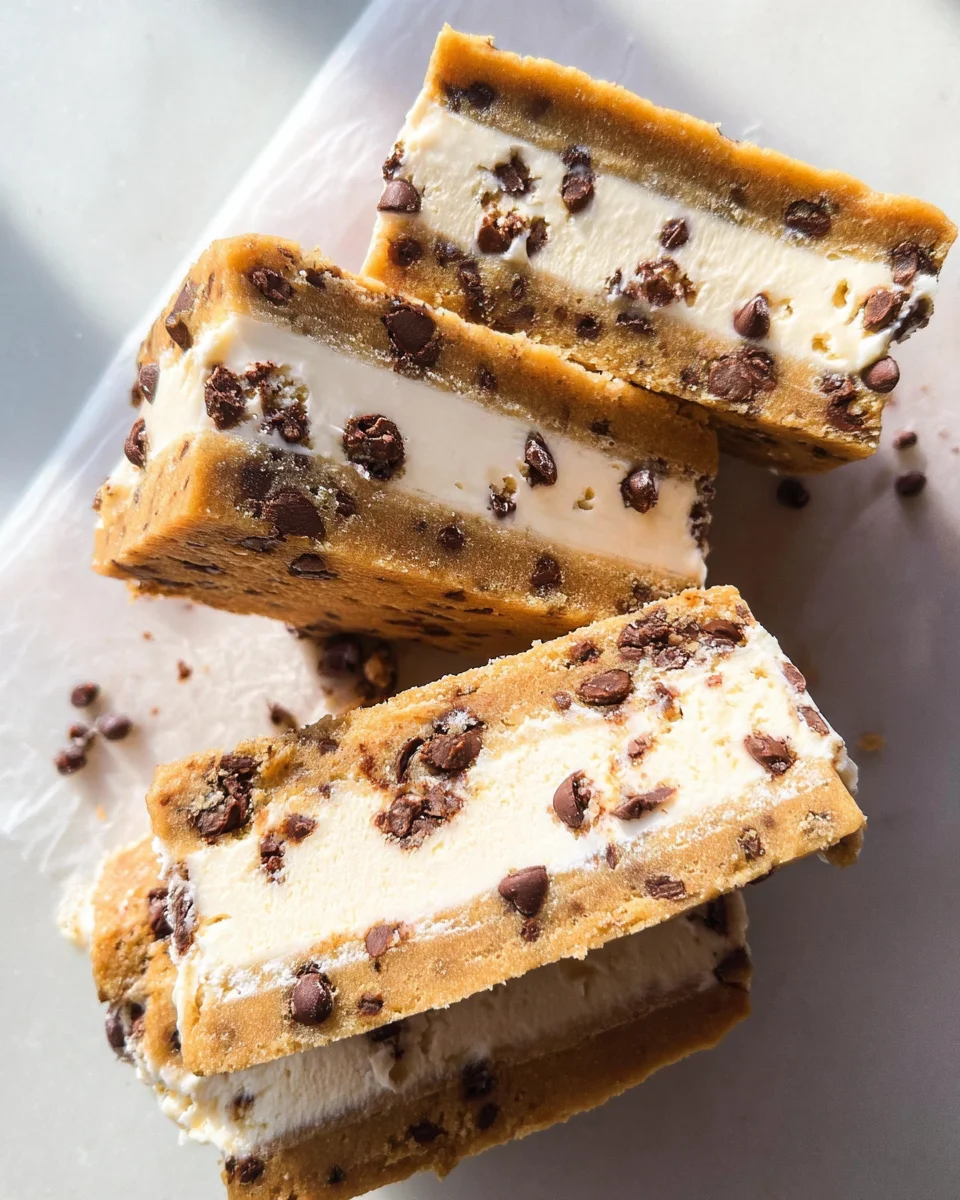
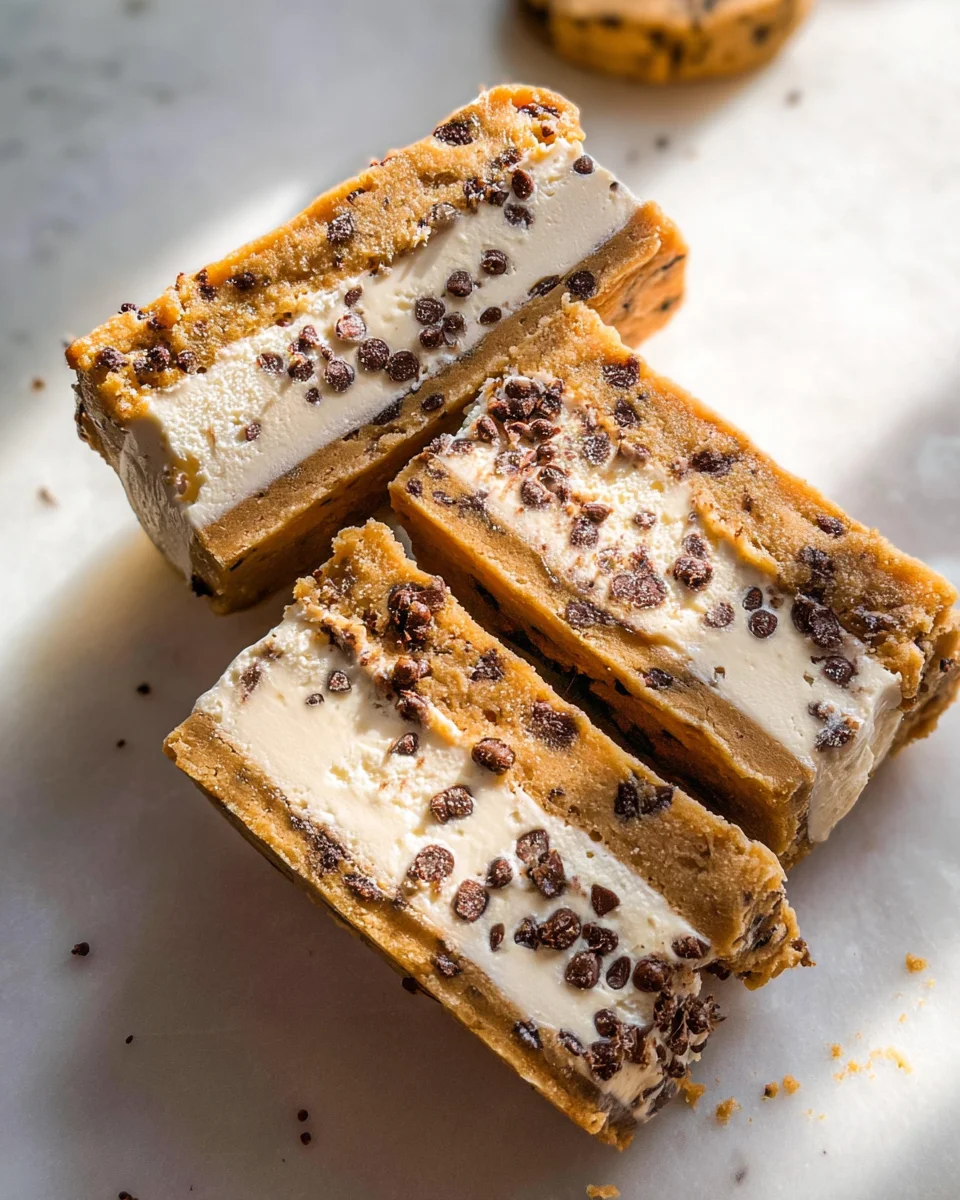
These Cookie Dough Vegan Ice Cream Sandwiches (Easy + No-Bake!) are a delightful treat for any occasion! With their soft and chewy cookie dough layers filled with creamy non-dairy ice cream, they offer the perfect balance of indulgence and health. Made with simple, wholesome ingredients, these sandwiches are gluten-free, nut-free, and naturally sweetened. Whether you’re hosting a summer party or just craving something sweet, these easy no-bake desserts will surely satisfy your taste buds!
Why You’ll Love This Recipe
- No-Bake Convenience: This recipe requires no baking, making it perfect for hot days when you want something sweet without turning on the oven.
- Healthy Ingredients: Made with wholesome components like maple syrup and gluten-free flour, you can indulge without guilt.
- Customizable Flavors: Feel free to swap in your favorite ice cream or add different mix-ins to the cookie dough for a unique twist.
- Kid-Friendly Fun: Making these ice cream sandwiches is a fun activity for kids. They’ll love helping to create their own treats!
- Make Ahead: These sandwiches can be prepared in advance and stored in the freezer, making them a great option for unexpected guests.
Tools and Preparation
Before diving into the deliciousness of this recipe, ensure you have the right tools on hand. Having everything ready will make your cooking experience smoother.
Grab This Chef Knife Now - Almost Gone!
- Stays Razor-Sharp: Ice-hardened blade keeps its edge longer than ordinary knives
- Superior Grip Control: Unique finger hole design gives you perfect balance and safety
- Built to Last a Lifetime: Premium stainless steel blade with elegant beech wood handle
Customer Reviews ★★★★★
Essential Tools and Equipment
Importance of Each Tool
- Parchment paper: Prevents sticking and makes cleanup a breeze.
- Rimmed baking sheet: Provides a sturdy base for assembling and freezing your sandwiches.
- Medium mixing bowl or stand mixer: Ensures even mixing of ingredients for a smooth cookie dough.
- Cutting board: A flat surface essential for slicing the frozen sandwiches into perfect portions.
Ingredients
For the Cookie Dough
- 1 flax egg (1 tablespoon ground flax + 2 tablespoons water; stir and let thicken 3–5 minutes)
- ½ cup vegan butter, melted (or grass-fed butter)
- ½ cup + 2 tablespoons pure maple syrup (or honey)
- 2 teaspoons vanilla extract
- 1¾ cups gluten-free flour (must contain xanthan gum; see note on heat-treating)
- ⅛ teaspoon pink Himalayan salt
- ½ cup mini dairy-free chocolate chips
For the Ice Cream Filling
How to Make Cookie Dough Vegan Ice Cream Sandwiches (Easy + No-Bake!)
Step 1: Prepare Your Workspace
Line a rimmed baking sheet with parchment paper and clear out space in your freezer.
Step 2: Mix Wet Ingredients
In a medium bowl or stand mixer:
1. Combine the thickened flax egg, melted vegan butter, maple syrup, and vanilla until smooth.
Step 3: Add Dry Ingredients
- Gradually add the heat-treated gluten-free flour and pink salt to the wet mixture.
- Mix for about 2 minutes until a soft dough forms.
Step 4: Incorporate Chocolate Chips
- Gently fold in the mini dairy-free chocolate chips.
- Transfer the dough to your prepared baking sheet.
Step 5: Shape the Dough
- Place another piece of parchment paper on top.
- Flatten the dough with your hands into a rectangle measuring about 15×12 inches and ¼ inch thick.
- Keep the top parchment on and freeze for at least 40 minutes until firm.
Step 6: Cut the Dough
Once firm:
1. Transfer the dough to a cutting board.
2. Slice vertically down the center to create two equal rectangles.
Step 7: Add Ice Cream Filling
If your ice cream is firm:
1. Let it soften at room temperature for about 10 minutes.
2. Spread softened ice cream evenly over one half of the cookie dough layer.
3. Carefully place the other half on top.
Step 8: Freeze Until Set
Transfer the sandwich back to the baking sheet:
1. Freeze for an additional 4 hours or overnight until set.
Step 9: Slice and Serve
Slice into desired shapes (about 18 medium-sized sandwiches) and serve! Store leftovers in an airtight container in the freezer for up to 5 months. Enjoy these delightful Cookie Dough Vegan Ice Cream Sandwiches anytime!
How to Serve Cookie Dough Vegan Ice Cream Sandwiches (Easy + No-Bake!)
These delicious cookie dough vegan ice cream sandwiches are perfect for any occasion. You can serve them at parties, summer gatherings, or just as a sweet treat after dinner. Here are some fun serving suggestions to make the most of this delightful dessert.
Share with Friends
- Invite friends over and serve these sandwiches in a platter for a fun dessert gathering.
Pair with Fresh Fruit
- Serve alongside fresh berries or sliced bananas for a refreshing contrast to the rich cookies.
Drizzle with Chocolate Sauce
- Add a drizzle of warm chocolate sauce on top for extra indulgence.
Create an Ice Cream Bar
- Set up a DIY ice cream bar where guests can customize their sandwiches with toppings like sprinkles, nuts, or coconut.
Enjoy with Coffee
- Serve these sandwiches with a cup of your favorite coffee or espresso for a delightful afternoon treat.
Pack for Picnics
- These sandwiches are easy to pack and make for a great outdoor dessert option during picnics or BBQs.
How to Perfect Cookie Dough Vegan Ice Cream Sandwiches (Easy + No-Bake!)
To achieve the best results with your cookie dough vegan ice cream sandwiches, follow these helpful tips. They will ensure your treat is both delicious and visually appealing.
-
Use Softened Ice Cream: Let your non-dairy ice cream sit out for about 10 minutes before spreading. This makes it easier to work with and helps avoid breakage of the cookie layers.
-
Chill Thoroughly: Make sure to freeze the assembled sandwich long enough—ideally overnight—to achieve the perfect texture.
-
Uniform Thickness: When flattening the dough, aim for an even thickness of about ¼ inch. This ensures that all sandwich pieces bake evenly.
-
Experiment with Fillings: Try different flavors of non-dairy ice cream or add fillings like peanut butter or fruit preserves between the layers for variety.
-
Store Properly: Keep leftovers in an airtight container in the freezer to maintain freshness and prevent freezer burn.
Best Side Dishes for Cookie Dough Vegan Ice Cream Sandwiches (Easy + No-Bake!)
These cookie dough vegan ice cream sandwiches pair well with various side dishes. Here are some tasty options that complement their rich flavors perfectly.
-
Fresh Fruit Salad: A mix of seasonal fruits adds a refreshing touch that balances the sweetness of the sandwiches.
-
Chocolate-Dipped Strawberries: The combination of chocolate and strawberries is always a hit, providing a gourmet touch to your dessert spread.
-
Coconut Whipped Cream: A dollop of this creamy delight enhances the overall experience and adds an extra layer of flavor.
-
Granola Parfait: Layer granola, yogurt (dairy-free), and berries in cups for a crunchy contrast that pairs perfectly with soft cookies.
-
Nut Butters: Serve almond or cashew butter on the side for those who enjoy dipping their cookies into something creamy and nutty.
-
Homemade Chia Pudding: This healthy option can be flavored with vanilla or cocoa powder, offering a nutritious yet tasty side.
-
Ice Cream Floats: Combine soda with scoops of non-dairy ice cream for fun floats that bring back childhood memories.
-
Baked Cinnamon Apples: Warm apples sprinkled with cinnamon offer comfort and balance out the coldness of the ice cream sandwiches.
Common Mistakes to Avoid
Making Cookie Dough Vegan Ice Cream Sandwiches (Easy + No-Bake!) can be a fun experience, but common mistakes can hinder your results.
- Skipping the flax egg: Not using a flax egg can lead to a dry and crumbly cookie dough. Always prepare it in advance to ensure the right texture.
- Using unheat-treated flour: Raw flour may contain harmful bacteria. Always heat-treat your flour before use for safety and better flavor.
- Not chilling the dough: If you don’t freeze the dough long enough, it won’t hold its shape when cutting. Be patient and freeze until firm.
- Overfilling with ice cream: Adding too much ice cream can cause spillage when pressing the layers together. Use a moderate amount for perfect assembly.
- Ignoring storage tips: Failing to store correctly can lead to freezer burn. Keep your sandwiches in an airtight container for maximum freshness.
Storage & Reheating Instructions
Refrigerator Storage
- Store in an airtight container.
- Best consumed within 3 days for optimal taste.
Freezing Cookie Dough Vegan Ice Cream Sandwiches (Easy + No-Bake!)
- Wrap each sandwich individually in plastic wrap or parchment paper.
- Store in a freezer-safe bag or container for up to 5 months.
Reheating Cookie Dough Vegan Ice Cream Sandwiches (Easy + No-Bake!)
- Oven: Preheat to 350°F, place on a baking sheet, and warm for about 5 minutes.
- Microwave: Heat on low power for about 10-15 seconds for a soft texture.
- Stovetop: Warm gently in a non-stick pan over low heat for a few minutes.
Frequently Asked Questions
Here are some common questions about making Cookie Dough Vegan Ice Cream Sandwiches (Easy + No-Bake!).
Can I use different flavors of ice cream?
Yes! You can swap vanilla non-dairy ice cream with any flavor you like, such as chocolate or mint.
How do I make this recipe gluten-free?
Simply use gluten-free flour that contains xanthan gum. Follow the instructions carefully for best results.
Is this dessert healthy?
Absolutely! These sandwiches are made with wholesome ingredients, are naturally sweetened, and are plant-based.
Can I customize the cookie dough?
Definitely! Feel free to add nuts, dried fruits, or different types of chocolate chips to suit your taste.
How do I prevent freezer burn on my sandwiches?
Store them in an airtight container or wrap them well before placing them in the freezer.
Final Thoughts
These Cookie Dough Vegan Ice Cream Sandwiches (Easy + No-Bake!) are not only delicious but also customizable to fit your preferences. You can mix up flavors and ingredients to create your own version of this delightful treat. Try making them today and enjoy a guilt-free indulgence!
Cookie Dough Vegan Ice Cream Sandwiches (Easy + No-Bake!)
- Total Time: 0 hours
- Yield: Approximately 9 servings 1x
Description
Indulge in the delightful world of Cookie Dough Vegan Ice Cream Sandwiches, where soft and chewy cookie dough layers embrace creamy non-dairy ice cream. This easy, no-bake recipe is a perfect treat for any occasion, offering a balance of indulgence and healthiness. Made with wholesome ingredients like gluten-free flour and pure maple syrup, these sandwiches cater to various dietary needs, being gluten-free, nut-free, and naturally sweetened. Whether you’re hosting a summer gathering or simply craving something sweet, these cookie dough ice cream sandwiches will surely satisfy your taste buds and leave everyone asking for more.
Ingredients
- 1 flax egg (1 tablespoon ground flax + 2 tablespoons water)
- ½ cup vegan butter
- ½ cup + 2 tablespoons pure maple syrup
- 2 teaspoons vanilla extract
- 1¾ cups gluten-free flour
- ⅛ teaspoon pink Himalayan salt
- ½ cup mini dairy-free chocolate chips
- 2½ cups vanilla non-dairy ice cream
Instructions
- Prepare a rimmed baking sheet with parchment paper and clear space in the freezer.
- In a mixing bowl or stand mixer, combine the flax egg, melted vegan butter, maple syrup, and vanilla until smooth.
- Gradually add the gluten-free flour and salt; mix until a soft dough forms.
- Fold in chocolate chips and spread the dough evenly on the prepared baking sheet.
- Flatten to about ¼ inch thick, cover with parchment paper, and freeze for at least 40 minutes.
- Once firm, cut the dough into two equal rectangles.
- Soften ice cream for about 10 minutes before spreading over one rectangle; place the other on top.
- Freeze again for at least 4 hours or overnight until set.
- Slice into desired shapes and serve!
- Prep Time: 25 minutes
- Cook Time: None
- Category: Dessert
- Method: No-Bake
- Cuisine: Vegan
Nutrition
- Serving Size: 1 sandwich (approximately 90g)
- Calories: 220
- Sugar: 12g
- Sodium: 110mg
- Fat: 9g
- Saturated Fat: 3g
- Unsaturated Fat: 6g
- Trans Fat: 0g
- Carbohydrates: 33g
- Fiber: 2g
- Protein: 3g
- Cholesterol: 0mg

