No-Bake Chocolate Bird Nests
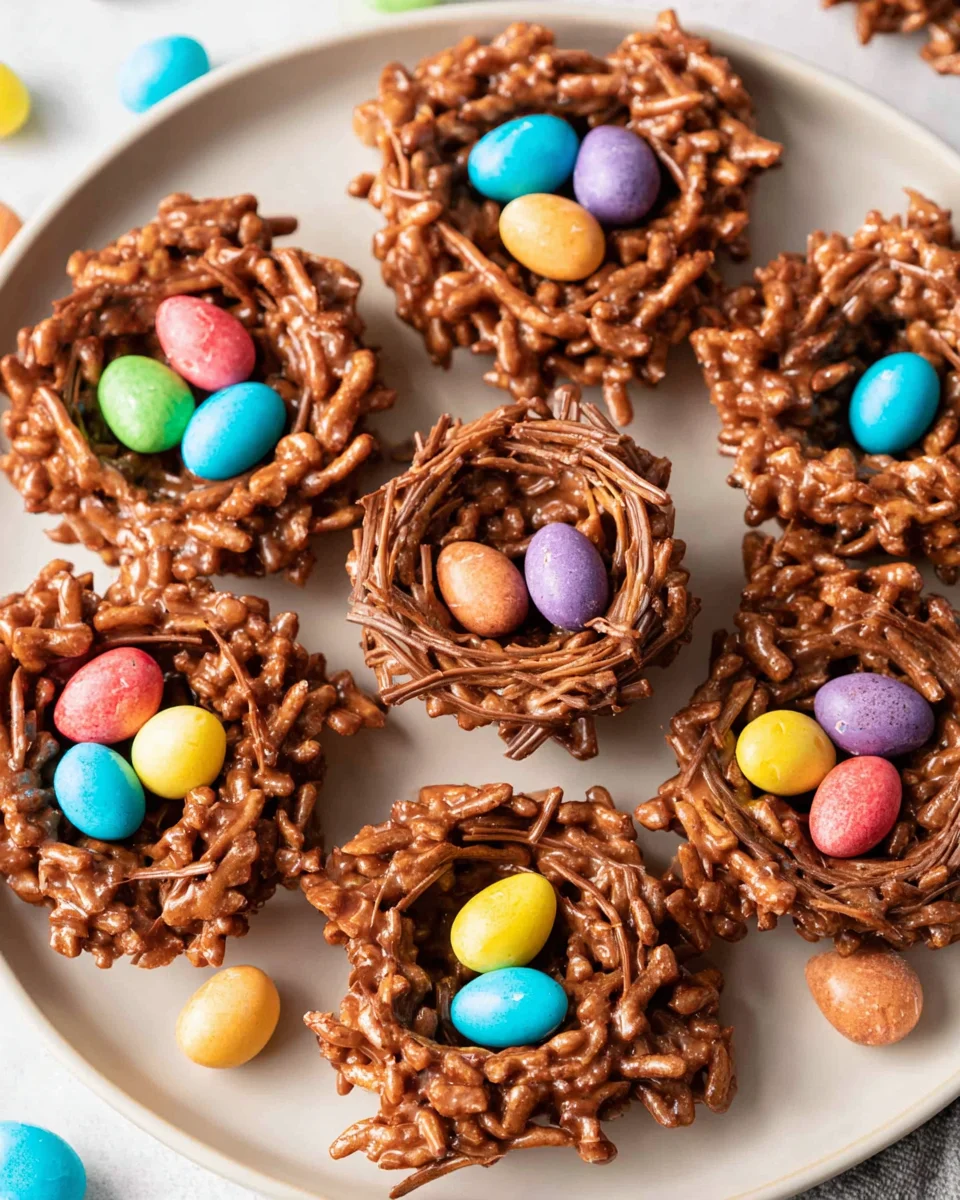
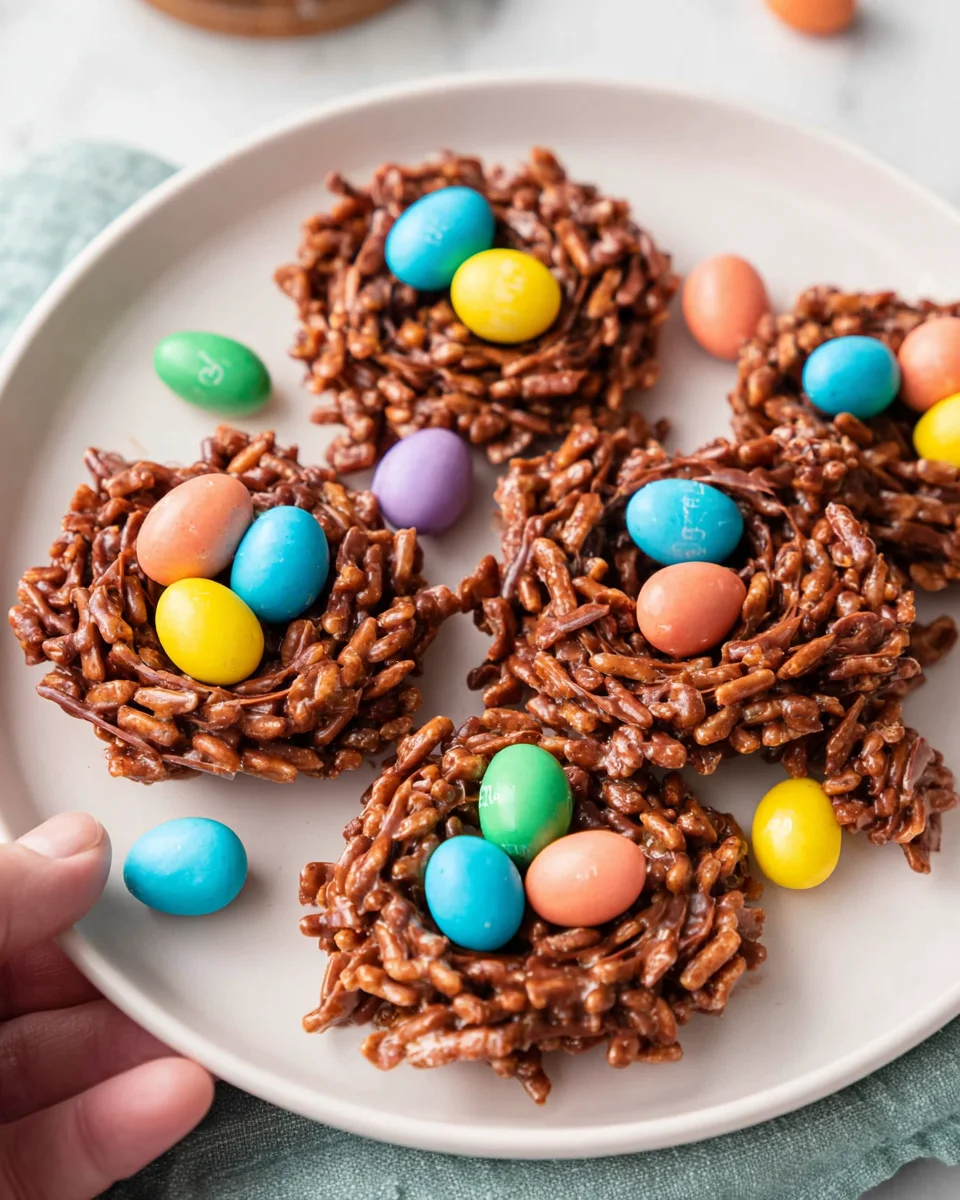
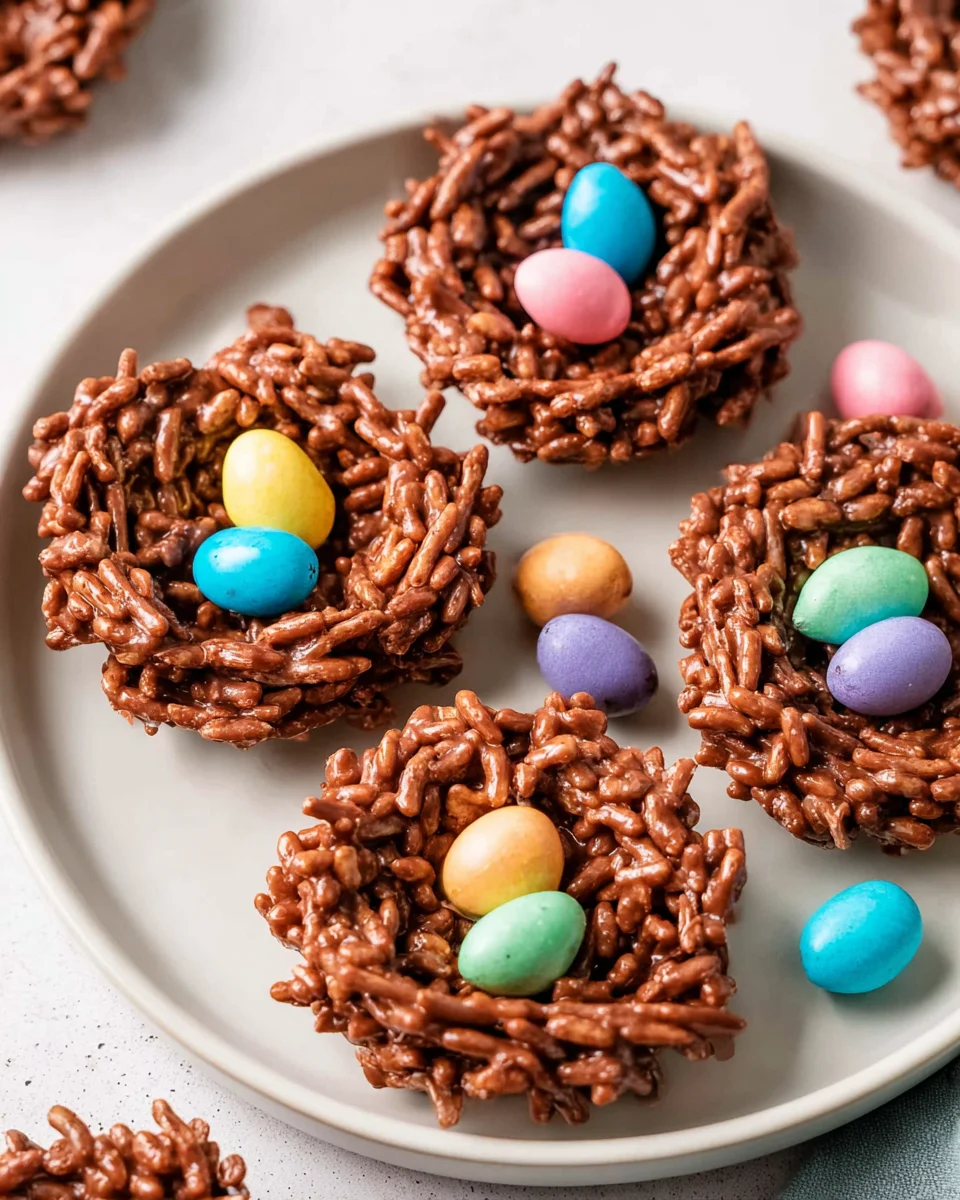
Chocolate Bird Nests are a delightful treat that bring joy and creativity to any occasion. With their unique shape and delicious combination of chocolate and peanut butter, these No-Bake Chocolate Bird Nests are perfect for Easter celebrations, spring gatherings, or simply as a fun snack for kids. The best part is that they require no baking, making them quick and easy to prepare!
Why You’ll Love This Recipe
- Quick Preparation: Ready in just 10 minutes, these nests make a hassle-free dessert option.
- No Baking Required: Enjoy the fun of making treats without the need for an oven.
- Kid-Friendly Fun: Involve the little ones in crafting their own bird nests with this simple recipe.
- Customizable: Feel free to swap out ingredients based on your preferences or dietary needs.
- Perfect for Celebrations: These nests are ideal for Easter but can be enjoyed year-round.
Tools and Preparation
To create your No-Bake Chocolate Bird Nests, you’ll need a few essential tools. Having the right equipment makes preparation easier and more enjoyable.
Grab This Chef Knife Now - Almost Gone!
- Stays Razor-Sharp: Ice-hardened blade keeps its edge longer than ordinary knives
- Superior Grip Control: Unique finger hole design gives you perfect balance and safety
- Built to Last a Lifetime: Premium stainless steel blade with elegant beech wood handle
Customer Reviews ★★★★★
Essential Tools and Equipment
Importance of Each Tool
- Muffin tin: This is crucial for shaping your nests; it helps create uniform portions that look great.
- Microwavable-safe bowl: Used for melting chocolate; ensures safety while heating.
- Measuring cups: Accurate measurements ensure the perfect ratio of ingredients for optimal flavor and texture.
Ingredients
Chocolate Bird Nests are a fun way to celebrate spring or make a delicious Easter dessert.
Main Ingredients
- 3 cups cocoa Rice Krispies
- 1 cup peanut butter
- 1 cup milk chocolate chips
- 36 Cadbury mini eggs
How to Make No-Bake Chocolate Bird Nests
Step 1: Melt the Chocolate
In a microwavable-safe bowl, melt the chocolate chips using low power in 30-second intervals. Stir between each interval until fully melted.
Step 2: Combine Peanut Butter and Chocolate
As soon as you remove the melted chocolate from the microwave, stir in the peanut butter until well combined.
Step 3: Coat the Rice Krispies
Pour the chocolate-peanut butter mixture over the cocoa Rice Krispies. Stir until all pieces are evenly coated with the mixture.
Step 4: Prepare the Muffin Tin
Grease a 12-count muffin tin using butter or cooking spray to prevent sticking.
Step 5: Fill the Muffin Tin
Scoop the mixture into each muffin cup, ensuring they are filled to the top.
Step 6: Form Nest Hollows
Use a round measuring spoon to gently hollow out the center of each filled cup to create a nest shape.
Step 7: Chill to Harden
Place your muffin tin in the fridge or freezer until the nests are firm enough to hold their shape.
Step 8: Add Cadbury Eggs
Once hardened, carefully place three Cadbury mini eggs into each nest. Your No-Bake Chocolate Bird Nests are now ready to be enjoyed!
How to Serve No-Bake Chocolate Bird Nests
No-Bake Chocolate Bird Nests are a delightful treat that can be enjoyed in various ways. Whether for an Easter celebration or a spring gathering, these nests bring joy and sweetness to any table. Here are some creative serving suggestions.
Individual Dessert Cups
- Serve each bird nest in a decorative cupcake liner for a fun presentation.
- Place them on a colorful platter for a festive look.
Family Style Sharing
- Arrange the nests on a large serving tray for everyone to share.
- This creates a communal atmosphere, perfect for family gatherings.
Pair with Ice Cream
- Top the nests with a scoop of your favorite ice cream.
- The combination of chocolate and cold ice cream is irresistible.
Add Fresh Fruits
- Accompany the nests with fresh berries or sliced bananas.
- This adds a refreshing contrast to the rich chocolate flavor.
Drizzle with Caramel Sauce
- A light drizzle of caramel over the nests enhances their sweetness.
- This extra touch will impress your guests!
How to Perfect No-Bake Chocolate Bird Nests
To make your No-Bake Chocolate Bird Nests even more delightful, consider these handy tips.
- Use High-Quality Ingredients – Choosing good quality chocolate chips and peanut butter will enhance the flavor significantly.
- Allow Enough Cooling Time – Let the nests chill until fully set; this ensures they hold their shape when served.
- Experiment with Toppings – Feel free to use different candies like jelly beans or chocolate-covered raisins instead of mini eggs.
- Customize the Cereal – Try using different cereals for unique textures; Cheerios or shredded wheat can work well too.
- Add Flavor Enhancements – A pinch of sea salt or vanilla extract can elevate the overall taste of your nests.
Best Side Dishes for No-Bake Chocolate Bird Nests
Serving side dishes alongside your No-Bake Chocolate Bird Nests can create a balanced dessert spread. Here are some delicious options that pair well:
- Fresh Fruit Salad – A mix of seasonal fruits provides a refreshing complement to the chocolatey treats.
- Mini Cheesecakes – These rich bites add variety and are always a crowd-pleaser at parties.
- Chocolate Fondue – Set up a fondue station where guests can dip fruits and marshmallows for added fun.
- Nutty Trail Mix – A crunchy mix of nuts and dried fruit offers texture and balances sweetness.
- Vanilla Pudding Cups – Creamy pudding works beautifully as an alternative dessert option for those who prefer it.
- Savory Cheese Platter – Including cheeses balances out the sweetness of the desserts and caters to diverse tastes.
Common Mistakes to Avoid
Making No-Bake Chocolate Bird Nests can be simple and fun, but there are common mistakes that can ruin your delicious treats.
- Not melting chocolate properly: Overheating chocolate can cause it to seize. Always melt in short intervals and stir frequently.
- Using the wrong cereal: Using a different type of cereal may not yield the same texture. Stick with cocoa Rice Krispies for the best results.
- Skipping the refrigeration step: Not allowing the nests to harden will result in a messy treat. Make sure to chill them until set for easy handling.
- Ignoring portion sizes: Filling the muffin tin too much can lead to overflowing. Use a measuring scoop to ensure even portions.
- Forgetting about customization: While the recipe is great as is, don’t hesitate to add nuts or dried fruit for added flavor and texture.
Storage & Reheating Instructions
Refrigerator Storage
- Store in an airtight container to maintain freshness.
- They can last up to 1 week in the fridge.
Freezing No-Bake Chocolate Bird Nests
- Place them in a freezer-safe container with parchment paper between layers.
- They will keep well for up to 2 months in the freezer.
Reheating No-Bake Chocolate Bird Nests
- Oven: Preheat oven to 350°F (175°C) for about 5-10 minutes. This method is not ideal, as you don’t want them to melt.
- Microwave: Heat on low power for 10-15 seconds if they start feeling too hard.
- Stovetop: Not recommended as it may change their structure.
Frequently Asked Questions
Here are some common questions about making No-Bake Chocolate Bird Nests.
Can I use dark chocolate instead?
Yes, dark chocolate will give a richer flavor. Just ensure it’s melted similarly.
How do I make them nut-free?
You can substitute peanut butter with sun butter or omit it entirely. Just ensure your chocolate is nut-free too.
What can I use instead of Cadbury mini eggs?
Feel free to use any small candy like jelly beans or M&M’s for decoration!
Are these suitable for kids?
Absolutely! They are fun and safe for children to help make, just supervise during melting chocolate.
Final Thoughts
These No-Bake Chocolate Bird Nests are not only delightful but also versatile. You can customize them with your favorite candies or nuts, making them perfect for any occasion. Give this easy recipe a try, and watch everyone enjoy these charming treats!

No-Bake Chocolate Bird Nests
- Total Time: 0 hours
- Yield: Approximately 12 nests 1x
Description
Indulge in the joy of springtime with these No-Bake Chocolate Bird Nests, a delightful treat that combines the rich flavors of chocolate and peanut butter. These charming nests are perfect for Easter celebrations or as a fun snack for kids, offering a quick and easy dessert option that requires no baking. With just 10 minutes of prep time, you can create these whimsical treats that not only look beautiful but also taste amazing. Each nest is topped with colorful Cadbury mini eggs, making them a festive addition to any table. Gather your family and enjoy crafting these sweet creations together!
Ingredients
- 3 cups cocoa Rice Krispies
- 1 cup peanut butter
- 1 cup milk chocolate chips
- 36 Cadbury mini eggs
Instructions
- Melt the chocolate chips in a microwavable-safe bowl at low power for 30 seconds at a time, stirring until smooth.
- Mix the melted chocolate with peanut butter until fully combined.
- Coat the cocoa Rice Krispies with the chocolate-peanut butter mixture, ensuring even coverage.
- Grease a muffin tin and fill each cup with the mixture, then hollow out centers to form nests.
- Chill until firm, then add three Cadbury mini eggs to each nest.
- Prep Time: 10 minutes
- Cook Time: N/A
- Category: Dessert
- Method: No-Bake
- Cuisine: American
Nutrition
- Serving Size: 1 nest (45g)
- Calories: 180
- Sugar: 10g
- Sodium: 75mg
- Fat: 9g
- Saturated Fat: 3g
- Unsaturated Fat: 6g
- Trans Fat: 0g
- Carbohydrates: 23g
- Fiber: 1g
- Protein: 3g
- Cholesterol: 0mg

